Posted on Leave a comment

Choosing the Ideal Water for Plant Cultivation

Water, the primary building block of life, plays a pivotal role in plant growth. The type of water used for irrigation can significantly affect the health and yield of your plants. This guide will take you through various water types and their suitability for plant growth, especially for cannabis cultivation.

The Importance of Water Quality in Plant Growth

When it comes to nurturing plants, the quality of water used can make a huge difference in the final results. Many people tend to use readily accessible tap water without considering the potential effects. Adding various products to the water for plant nutrition without monitoring the pH or EC levels can be damaging. This negligence increases the likelihood of plant diseases, attracts pests, and ultimately affects the quality of the crops. Therefore, ensuring water quality and adopting proper monitoring practices are crucial for successful plant growth.

Exploring Different Types of Water for Plant Growth

Let’s delve into the different types of water you can use for plant growth, whether they’re cannabis, ornamental plants or flowers.

Tap Water

Tap water, due to its convenience, is a common choice for watering plants. However, its suitability largely depends on your geographical location as water properties tend to vary. Tap water can be classified as hard (EC + 0.8), medium (EC + 0.4), or soft (EC – 0.4), with a typically alkaline pH over 7.0. It may contain additives like lime, chlorine, and fluoride, which can negatively impact soil health and quality.

To put this into perspective, Canadian tap water is generally considered to be hard, or extremely hard. To make tap water suitable for plants, you can employ certain measures. Letting the water to stand for around 24 hours allows minerals and components to settle at the bottom of the tank. Alternatively, using an osmosis filter can purify the water, making it safe for consumption.

Distilled Water

Available in supermarkets and drug stores, distilled water is devoid of minerals and microorganisms, making it an excellent choice for plants. However, its lack of minerals makes it unsuitable for continuous use. When using it for plants, remember that it usually has a pH above 7.0 and an EC of 0.0. To make it fit for plant growth, adjust the pH and add calcium and magnesium until reaching a 0.4 EC.

Distilled water is produced through a process called distillation, where the water is heated until it vaporizes. The vapor is then cooled to condense the water, leaving behind any other components that evaporated during the process.

Air Conditioner Water

Air conditioner water, collected from your air conditioner, can be used for watering your plants as it’s essentially distilled water. However, depending on the age of your AC unit and its design, it may have an EC of 0.4 rather than 0.0. Its pH is usually over 7.0.

Reverse Osmosis Water

Reverse osmosis water is akin to distilled water, although not entirely pure. It doesn’t eliminate all minerals and impurities like lime and chlorine. By installing a high-quality osmosis filter, you can easily obtain reverse osmosis water at home. Typically, osmosis filters produce water with less than 0.4 EC and around a 7.0 pH, making it suitable for both drinking and watering plants without requiring additional modifications.

Reverse osmosis water is produced by filters that capture minerals and other unwanted elements in the water. The purity of the water depends on the filter and its model, resulting in varying levels of purity.

Rain Water

Rainwater, collected directly from nature, is obtained by storing rain in tanks for later use. While it is generally not considered potable, it can be effectively used for watering various types of plants. As rain gathers, it naturally eliminates harmful elements, and since plants in nature thrive on rainwater, it is considered one of the purest fresh waters on Earth. Rainwater usually has a pH close to 7.0 and an EC no higher than 0.4.

To obtain high-quality rainwater, set up a water collection system that remains as clean as possible to avoid absorbing any elements that could compromise water quality. Consider installing an impurity filter for added purification. For optimal results, use rainwater collected outside of cities, as urban rain is often contaminated due to its descent through polluted environments.

Check out our Resource Centre for more product information

Read More


Posted on Leave a comment

A Comprehensive Guide to Indoor Succulent Care: Essential Tips for Beginners in Canada

If you’re a newbie plant parent in Canada seeking to learn the basics of caring for your fresh plants, then you’re in the right place. Succulents, with their thick, hardy leaves or broad stems that store water, are a popular choice for indoor plants. They are known for their ability to conserve water and withstand dryness, making them a perfect fit for dry conditions and drought-prone areas. Despite their reputation for being low-maintenance, caring for succulents can sometimes be challenging. But don’t fret, we’re here to simplify things for you with some crucial care tips that will help your succulents grow and flourish.

Succulents: An Ideal Choice for the Canadian Household

Succulents are excellent indoor houseplants for Canadian households, where winter dominates for almost 8 months of the year (unless you’re lucky enough to be in British Columbia). For example, snake plants, a popular type of succulent, are ideal for indoor environments as they can survive in low-light conditions. Below are some tips on caring for succulents inside your home. Follow these, and your houseplants will be eternally grateful.

Fundamental Care Tips for Succulents

1. Choose a Pot with Drainage Holes

Succulents are accustomed to living in high temperatures with minimal water. Their roots dislike wet conditions and are susceptible to rot, so it’s crucial that the pots used for succulents allow proper drainage for excess water. In fact, excessive moisture can be lethal for succulents, making this an essential point to remember.

2. Place Succulents Near a Window for Bright Light

These sun-loving plants thrive in hot climates and should receive plenty of light — but not so much that they get scorched. If your plant is growing predominantly in one direction, it may be a sign that the other side requires more light. Rotate your plant regularly to ensure each side receives ample sunlight, aiming for at least half a day’s worth of sunlight each day.

3. How often to water succulents

While it’s crucial not to overwater succulents, underwatering can also pose problems. Succulents are not accustomed to wet conditions, and too much moisture can cause their roots to rot. However, this doesn’t mean you should just spritz the soil lightly. As a general rule, the soil should be thoroughly soaked approximately every two to three weeks, although this can vary depending on the type of plant. We recommend the ‘soak and dry’ method for watering your succulents: saturate the soil with water and wait for it to dry out completely before rewatering. When watering, pour water directly onto the base of the plant, avoiding the leaves as this can lead to decay.

4. Opt for Well-Draining Soil

As previously mentioned, succulents detest dampness. Regular potting soil often retains too much moisture for these plants. To enhance drainage, consider adding sand or gravel to the potting mix. Alternatively, cactus soil is also a suitable choice.

5. Maintain High Temperatures

Succulents are fans of warm weather. During the summer months, they prefer temperatures between 21 to 26℃, while in winter, temperatures should range from 14 to 20℃.

The Role of Fertilizers in Succulent Care

Fertilizers can aid plants during their growth phase. However, if you’re using soil, fertilizers aren’t necessary as plants can derive most of their required nutrients from the soil. If you choose to use fertilizers, timing is crucial. Spring, when new growth occurs, is the best time to start. Fertilizers can be applied once a month, but they aren’t needed in winter as most plants are dormant with little growth during this season.

For a health boost, consider using a water-soluble fertilizer, diluting it according to the product’s recommendations. Homemade fertilizers are also beneficial; you can use crushed eggshells, Epsom salt, banana peels, or coffee grounds. These can be found in your kitchen and placed on top of the soil, then removed after a few days to prevent mold growth.

Where should I get fertilizers for my succulent plants?

If you’re looking for liquid fertilizers that will suit a range of different succulent types, be sure to check out the range offered by GreenPlanet Nutrients. GreenPlanet Nutrients fertilizers are especially designed to ensure the maximum yield is reached for all your plants and succulents. Suitable for any and all craft growers, both their liquid and dry fertilizers make great choices for your plants. If you’re looking to find out the difference between dry fertilizers and liquid fertilizers, check out this helpful article. You can also take a look at the different ranges available below:

Pruning and Maintenance of Succulents

When your succulent plants start to outgrow their pots, pruning can help keep them tidy and neat. If your succulents have thorns, spines, or milky sap, be sure to wear gloves for protection.

To prune succulents, carefully examine the stems and leaves. Look for leaf nodes in overgrown areas that would allow growth in the desired direction, then make your cuts. You can save these trimmings and use them to propagate more plants. Just let them dry for a day before replanting.

Additionally, it’s essential to remove any debris, dust, and dead leaves from your succulent. This promotes new growth, keeps pests at bay, and ensures your plant remains healthy and attractive. You can simply wipe the leaves with a damp cloth or use a small brush to dust off impurities.

Repotting Succulents: The Final Step

A growing plant is a happy plant. But if your succulent is outgrowing its pot, it’s time to give it a new home. Choose a new pot for your plant – terracotta pots are a good option since they allow the soil to dry quickly. Glazed and plastic pots are also suitable.

To repot your succulent, gently remove it from its current container. Brush off excess dirt from the roots, being careful not to damage this delicate part of the plant. After adding soil to the new pot, carefully place your succulent inside. Fill the sides around the roots with more soil until you reach ¾ of an inch below the rim of the container. Then, give the plant a week to adjust before watering it in its new home. Repotting is beneficial as it provides your plant with fresh soil and more room to grow.

Check out our Resource Centre for more product information

Read More


Posted on Leave a comment

How and When to Harvest Cannabis Buds

In the life-cycle of a cannabis plant, the harvesting stage is of utmost importance and requires careful attention for achieving optimal results. If you are growing cannabis, this comprehensive guide will help you understand the key factors that determine the perfect time to harvest your cannabis buds.

Understanding the Harvesting Cycle

When it comes to harvesting cannabis, timing is everything. Harvesting too early or too late can drastically impact the quality, flavor, and effects of your buds.

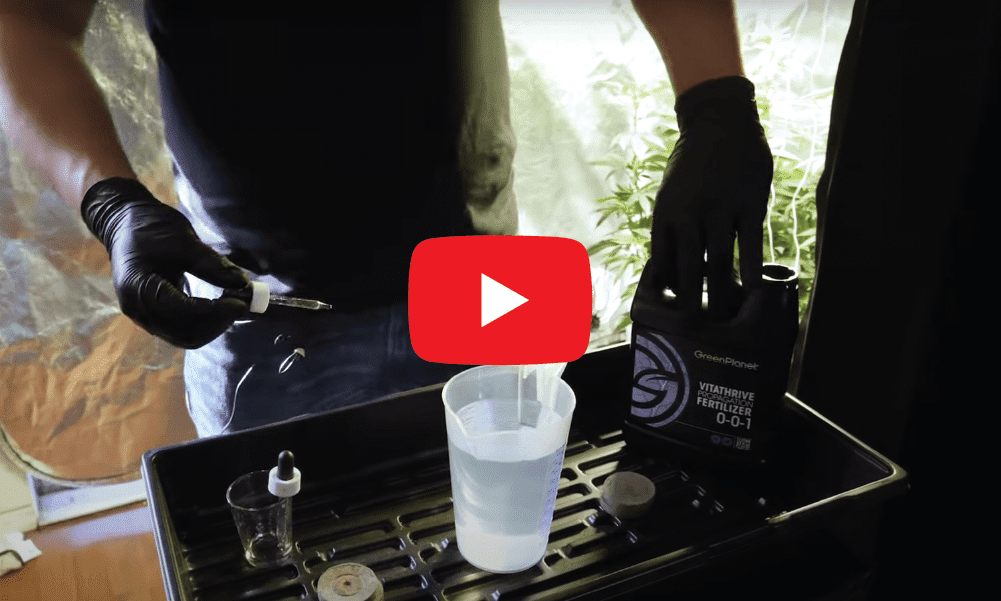
However, before you can think about harvesting your cannabis seeds, you need to ensure that your seeds are properly prepped and germinated. For this, check out the video below with guidance from our friends at Grow Your Four:

Harvesting your cannabis at the right time is crucial. If you harvest too early, you may end up with less potent buds with lesser flavor. On the other hand, harvesting too late can lead to buds with a milder taste and diminished psychoactive effects.

Factors Determining Harvesting Time

There are several factors at play when it comes to determining the right time to harvest your cannabis. It’s important to take all of these factors in when choosing your cannabis harvest time.

Seed Bank’s Recommendations

When you buy cannabis seeds, it is advisable to follow the seed bank’s recommended harvesting times for that certain seed – each seed is different and could have different recommended times or advice. However, these recommendations can be flexible as the growth conditions can vary widely.

Pistil Colors

Pistils, the brown ‘hair-like’ structures on cannabis flowers, are good indicators of when it’s time to harvest. As the oxidation level decreases, the pistils turn browner, leading to higher psychoactive effects. On the other hand, increased oxidation results in greater narcotic effects. It’s usually recommended to harvest your buds when about half the pistils turn brown.

Trichomes’ Shape

Trichomes, the cells found on the cannabis flowers’ epidermis, are responsible for producing cannabinoids. They grow in a mushroom-like shape and indicate harvest-readiness when they stop producing new trichomes and become filled with resin. For more information on trichomes, check out this useful guide.

trichomes on cannabis

Harvesting Too Early or Too Late: The Consequences

If you harvest your cannabis too early or too late can have adverse effects on the final product.

Harvesting too early poses potential issues with quality and yield: diminished flavor intensity, buds with lower chlorophyll levels and reduced terpene content. Additionally, premature harvesting may lead to smaller, less dense buds during the drying phase, resulting in diminished volume. Notably, the effects of the harvest would be compromised as the white trichomes wouldn’t have fully developed. Ultimately, premature harvesting significantly diminishes the crop’s potential yield.

However, harvesting too late can lead to buds becoming overripe, resulting in a loss of flavor and shorter curing times. As time progresses, the psychoactive potency decreases, as THC oxidizes into CBN, diminishing the characteristic effects of the cannabinoid. Consequently, the harvested weed transforms into a more tranquil and narcotic variant.

Recommendations for Harvesting Cannabis

When it comes to harvesting cannabis, patience is key. Even when the pistils and trichomes seem ready for harvesting, it is advisable to wait for an additional two weeks for the best results. There are a few fertilizers that you can use to help reap the most from your cannabis harvest, why not try using X product? Short description about x product.

Frequently Asked Questions

When Should I Harvest Cannabis Buds?

The exact time to harvest cannabis buds will depend on your strain and the seed bank’s recommendations. Generally, you should start when about 60%-80% of the pistils have matured and turned a brown-orange color.

What Happens if I Harvest Too Early?

If you harvest too early, your plant may not reach its full potential, leading to a loss in aroma and effects. The same can happen if you harvest too late.

Is It Better to Harvest Cannabis Buds in the Daytime or at Night?

The best time to harvest your cannabis buds is in the early morning outdoors or when you turn on your growing light indoors. This is because resin production is higher at night.

How Many Days Should I Wait Without Watering My Plants?

You should stop watering and fertilizing your plants around 10-15 days before harvest. During this period, perform a root wash and irrigate with clean water until harvest time.

For more FAQs about harvesting, and plant nutrients, click here.

Check out our Resource Centre for more product information

Read More


Posted on Leave a comment

Feed Smarter, Not Harder: How Canadian Growers Are Optimising Feed Schedules in 2025

In the ever-evolving Canadian cultivation industry, one trend stands tall in 2025: precision feed scheduling. Commercial cultivators and home growers alike are ditching vague, one-size-fits-all feeding routines in favour of detailed, stage-specific programs that maximise nutrient efficiency and reduce plant stress.

Whether you’re in a hydroponic setup in Toronto or a craft grow in Alberta, the key to modern growing success is no longer “more nutrients”- it’s smarter feeding. That’s where GreenPlanet Nutrients shines.

The Problem with Overfeeding

For years, feeding schedules across the industry leaned toward overfeeding, often to the detriment of plant health. Overapplication of nutrients can result in:

  • Salt build-up
  • Nutrient lockout
  • Leaf tip burn
  • Lower microbial activity in the root zone

Worse still, wasted nutrients mean wasted dollars—an increasing concern in a tightening Canadian market.

Smarter Feeding for 2025 and Beyond

Growers are now aligning their feeding with the plant’s actual needs during each phase of the grow cycle. GreenPlanet’s systems support this with:

  • Nutrient calculators for dialling in exact volumes
  • Scalable schedules for any size operation
  • Clean formulas that mix and drain efficiently, reducing residue and build-up

GreenPlanet’s Customisable Feed Programs

Whether you’re growing in coco, soil, or recirculating hydro, GreenPlanet’s programs allow for full control:

GP3 Base Nutrient System

A 3-part solution (Grow, Micro, Bloom) that can be dialled in week-by-week to match your plant’s exact demands. Ideal for growers who want full control.

Dual Fuel Program

A simplified 2-part program perfect for commercial facilities that want consistent results with minimal complexity.

Additives to Fine-Tune Results

  • Vitathrive: A vitamin supplement that helps plants recover from stress and boost early-stage development.
  • Rezin: Boosts essential oil and terpene production during flowering.
  • Massive Bloom: Increases flower size, density, and yield without nutrient burn.

Canadian Growers Are Leading the Shift

  • Indoor growers in Montreal are using EC and runoff monitoring paired with GreenPlanet calculators to optimise feeding volume and reduce waste.
  • Licensed producers in Saskatchewan are reducing nutrient costs by up to 30% by moving from fixed-rate feeding to data-driven nutrient delivery.
  • Home growers in Nova Scotia are seeing stronger, healthier plants using simplified Dual Fuel systems and consistent pH-balanced feeding.

Pro Tips for Smarter Feeding

  1. Track Everything: Record pH, EC, runoff ppm, and feeding amounts in a digital grow log.
  2. Use the Calculator: GreenPlanet’s Nutrient Calculator ensures every dose is accurate.
  3. Watch Your Runoff: High EC in runoff? You’re overfeeding. Low? You might be starving your plants.
  4. Less Is More: When in doubt, underfeed slightly – then adjust based on plant feedback.

Final Thoughts

Canada’s cultivation landscape is maturing, and so are its growers. In 2025, it’s not about dumping more nutrients into your medium – it’s about feeding smarter with tailored programs, real-time monitoring, and reliable products like those from GreenPlanet.

Feed smarter, grow better – explore GreenPlanet’s full line of nutrients and feed programs at greenplanetnutrients.ca.

Posted on Leave a comment

Living Soil Cultivation in Canada: A 2025 Resurgence with GreenPlanet’s Organic Additives

In 2025, Canadian cultivators are embracing a growing trend rooted in age-old wisdom—living soil cultivation. From British Columbia’s craft cannabis farms to Quebec’s boutique greenhouses, growers are moving away from synthetic-heavy systems and toward regenerative, microbiome-friendly cultivation that prioritises soil health.

Living soil is no longer a fringe experiment. It’s a proven path to robust plants, rich terpene profiles, and sustainable growing practices. At the heart of this movement? Organic-compatible inputs like those offered by GreenPlanet Nutrients.

What Is Living Soil?

Living soil refers to a biologically active growing medium filled with beneficial microbes, fungi, organic matter, and trace minerals that feed and sustain plants naturally. Rather than relying on synthetic nutrients, the soil itself becomes a dynamic, self-sustaining ecosystem.

Key features of living soil systems:

  • Teeming with mycorrhizae and beneficial bacteria
  • Built from compost, worm castings, peat, and amendments
  • Focused on feeding the soil food web, not just the plant
  • Often used in no-till or reduced-till practices

Growers monitor the soil like a living organism – balancing moisture, organic matter, and microbial life to allow plants to draw what they need, when they need it.

Why Canadian Growers Are Going Organic

With stricter regulations on runoff and environmental stewardship, Canadian cultivators are embracing eco-friendly growing for long-term viability. And with consumer demand soaring for terpene-rich, pesticide-free flower, living soil has become a premium market differentiator.

Other motivators include:

  • Cost savings from reduced inputs
  • Less plant stress due to stable microbe-driven nutrition
  • Enhanced flavour and aroma profiles in end products

GreenPlanet’s Role in Living Soil Cultivation

GreenPlanet Nutrients supports living soil growers with a suite of products that feed microbial activity, strengthen plant structure, and support consistent yields – even in organic systems.

Key products for living soil growers:

  • Liquid Weight – A carbohydrate-rich blend that feeds microbial colonies and enhances nutrient uptake.
  • Root Builder – Contains beneficial microbes that colonise the rhizosphere, promoting strong root growth and plant resilience.
  • Plant Guard – Provides potassium silicate to fortify cell walls and boost resistance to stress, especially in organic systems lacking in natural silica.

These products are designed to complement, not override, living soil biology.

Real-World Canadian Applications

  • B.C. Craft Cannabis: Small-batch farms in the Okanagan are replacing synthetic-heavy programs with worm castings, dry amendments, and GreenPlanet additives to enhance quality and save on input costs.
  • Ontario Greenhouses: Organic leafy green producers are combining compost tea applications with Liquid Weight to improve nutrient cycling and reduce synthetic dependency.

Posted on Leave a comment

Battling Fungus Gnats: A Comprehensive Guide

Fungus gnats, tiny black flies that are a common pest in indoor plants, can wreak havoc on your greenery if left unchecked. Let’s delve deep into understanding these pests and how to effectively control them.

What are Fungus Gnats?

Fungus gnats, belonging to the Mycetophilidae and Sciaridae families, show a preference for indoor plants where humidity levels and moisture are high. These pests are typically noticed when adults begin flying around house plants or gathering at a window close by.

Adult fungus gnats are small black flies, about 3-4 mm long, and their larvae, which are white and legless, resemble tiny worms.

Life Cycle of Fungus Gnats

Understanding the life cycle of these pests is crucial to managing an infestation. Adult fungus gnats live for about a week and lay up to 300 eggs in rich, moist soils. Within 4-6 days, tiny larvae emerge and begin feeding on plant roots during their two-week period. The pupal stage lasts 3-4 days before young adults leave the soil and begin the next generation. The entire life cycle from egg to adult may be completed in as little as 3-4 weeks depending on temperature.

Recognizing Fungus Gnat Damage

Fungus gnats can damage plants above and below the soil. Signs of a fungal gnat infestation in plants include sudden wilting, loss of vigor, poor growth, as well as yellowing. Severe infestations could also result in the loss of a significant portion of the plants.

Preventing Fungus Gnats

Prevention is the best method of controlling fungus gnats. It stops you having to deal with the problem whilst making your plants safer. Here are some preventive measures one can take:

  1. Inspect plants: Before purchasing any plant, thoroughly inspect it for signs of insect pests. Carefully turn up soil near the base of the plant and look for the glossy, clear larvae. You should avoid any plant sending up flying gnats.
  2. Careful watering: Fungus gnats thrive in damp soils, so be careful not to overwater, especially during winter months when plants require less water.

Fungus Gnats Treatment

If you already have a fungus gnat problem, don’t worry. There are several effective treatments you can use. Let’s go over the most effective ones now:

  1. Soil drying: Allow the soil to dry to a depth of one to two inches between waterings. This not only kills larvae and inhibits the development of eggs, it also makes the soil less attractive to egg-laying females.
  2. Yellow Sticky Traps: Place these horizontally at the soil surface to capture large numbers of egg-laying adults.
  3. Beneficial Nematodes: To destroy the larvae stage, these can be used to top dress houseplants. Nematodes are microscopic round worms that penetrate fungus gnat larvae, after they will release a bacterium that consumes the pest from the inside out.

Remember, due to the rapid life cycle of fungus gnats, treatment often requires repeated applications until there are no surviving eggs.

As the saying goes, an ounce of prevention is also worth a pound of cure. So, keep an eye out for these pesky pests and take action at the first sign of trouble.

If you’re looking to reduce your chances of getting fungus gnats on your plants, it would help to use high-quality nutrients and plant products, that are also used by professionals. To access the programs available at GreenPlanet Nutrients, contact a member of the GreenPlanet sales team, or also your local garden supply store for product information and purchasing inquiries. 

For fungus gnats, take a look at the product below, which is ideal for maintaining your plants through fungus gnats, or any other pests to your plants.

Check out our Resource Centre for more product information

Read More


Posted on Leave a comment

What are Additive Nutrients?

An additive nutrient, or nutrient supplement, can be described as any plant food product that seeks to enhance natural patterns of development. Unlike base nutrients, which are designed to progress and maintain healthy patterns of growth and bloom, additive nutrients and supplements aim to promote specific actions, whether it be the development of large, dense flowers, trichome production, root growth, or rapid cell expansion. While the importance of base nutrient supplements is unparalleled in the lifecycle of a plant, additives also have an important role to play. By combining additives with clean, quality-focused base nutrients, growers can easily push their crop beyond its genetic limits. For new growers, discovering the function of unique nutrient additives can be a challenging task. So, before committing to a nutrient system, read the article below for more information on our selection of additives. 

Trying to figure out which GreenPlanet Nutrients product is an additive nutrient? Look out for the Additive Icon found on the front of our bottles.

Learn more about our Bottle Icons in the video above!

A Closer Look at Additive Nutrients

So what are additive nutrients? Unlike base nutrients, which can be described as a foundation for plant growth, additive nutrients are supplements that aim to promote specific actions and outcomes. There are a wide variety of additive nutrients. For example, GreenPlanet Nutrients manufactures 16 nutrient additives, ranging from beneficial bacteria supplements, bloom boosters, carbohydrates, enzymes, and hormone inoculants. While all these supplements have different desired actions and outcomes, they all aim to enhance the natural growth patterns of plants. Let’s take a look at some of our most exciting nutrient supplements. 

Get a Variety of Benefits from Additive Nutrients

Massive Bloom Formulation: Blooming Supplement 

Plants require an incredible amount of nutrients during the peak of flower. Luckily, GreenPlanet manufactures the king of bloom-enhancing supplements – Massive Bloom Formulation. Balanced evenly with an N-P-K of 1-2-3 and loaded with carbohydrates and L-amino acids, Massive has been trusted by the growing GreenPlanet community for over 20 years. It promises heavy harvests and quality flowers, so if you’re looking for a tested, reliable source of plant nutrition during the flowering stage, except no substitutes for Massive Bloom Formulation.

PK Spike: Blooming Supplement 

GreenPlanet Nutrients PK Spike is an excellent example of a clean, quality-focused bloom-enhancing supplement. Formulated with high-grade phosphorus and potassium, PK Spike can quickly increase root mass, speed up the production of flower sites and strengthen a plant’s cell walls for the later support of heavy flowers. It’s also hyper-concentrated and highly water-soluble. That’s why PK Spike is the ideal bloom-enhancing supplement for growers in hydroponic gardens, AutoPot Watering Systems, or drip irrigation networks. 

Dense: Flower Hardener 

Suppose the environmental conditions of a garden are less than ideal, for example. If temperatures or humidity percentages reach inadequate levels for extended periods, mature buds can become loose, lose rigidity, or become soft and sponge-like. Add GreenPlanet Nutrients Dense Bud Compactor to your feeding program to increase late-flower hardiness. Horti-rawk provides your plants with a hyper-concentrated amount of potassium during the later stages of the flowering period. This increase in potassium helps encourage the tight formation of mature flowers.

Rezin: Trichome Enhancer

Rezin is our blooming additive formulated to enhance the natural processes within flowering plants that produce flavour and aroma. Growers can use Rezin at any time during the flowering period to encourage plants to express and expand terpenes and trichomes in flowers and across sugar leaves. However, adding Rezin during the last week of the vegetative stage has increased the amounts of potential terpenes ready for full expression in the later stages of flower. To ensure GreenPlanet growers get the highest quality product and result possible, our formula contains no plant growth regulators (PGR), artificial colouring or dyes. It can be used until the final days before harvest.

Liquid Weight: Carbohydrate Supplement

GreenPlanet Nutrients Liquid Weight contains simple sugars which encourage the rapid growth of healthy bacteria, fungi, and protozoa in your root zone; pairing your regular feeding program with a sugary, carbohydrate supplement will help to speed up the growth rate of beneficial microbes. Plants spend much energy releasing complex sugars like cellulose into the root zone. So, by supplementing your plant’s expenditures with additional carbs, you can be sure the beneficial microbes in your soil will be plentifully fed, which in turn will support the cultivation and growth of your living medium. Adding a liquid carbohydrate supplement to your feeding program during the flowering phase will encourage your plants to feed heavier, increase output, enhance yields, and lead to more desirable flavours, pigmentation, terpene density, and trichome expansion.

Root Builder: Beneficial Bacteria

GreenPlanet Nutrients Root Builder is densely packed with two extremely active beneficial bacteria strains: Bacillus licheniformis and Bacillus Subtilis. Both of these microorganisms have different roles in the root zone. For example, Bacillus licheniformis is utilized quickly to break down soluble minerals and convert them to energy for the plant. On the other hand, strains of Bacillus Subtilis mainly support a plant’s immune system by producing molecules called iturins, which target and eliminate sources of harmful bacteria. Without healthy probiotic supplements like Root Builder, stressful environmental conditions, inconsistent irrigation, or a deficient feeding program may produce a diseased root zone incapable of supporting steady growth. 

Ocean Magic: Natural Kelp Additive 

Ocean Magic is a vegetative additive derived from cold-pressed Atlantic Sea Kelp, that delivers a variety of benefits to your plants. For example, the ingredients found in Ocean Magic support properties such as rooting and the reduction of environmental and plant stress. Used as either a root-soak or foliar spray, Ocean Magic contains special, natural plant hormones including auxins, cytokinins, and gibberellins, which have been linked to promoting vigorous growth, branching, and increased resistance to stress in plants.

Whatever your style of garden, chances are, GreenPlanet Nutrients has the perfect base nutrient program. To access the programs available at GreenPlanet Nutrients, contact a member of the GreenPlanet sales team, or your local garden supply store for product information and purchasing inquiries. 

Check out our Resource Centre for more product information

Read More


Posted on Leave a comment

Why Testing the pH of Your Runoff Can Save Your Crop

If you’ve recently noticed some leaf discoloration, mutation, or poor growth, it’s quite likely an inadequate pH range is the culprit behind these issues. pH is among the most important factors in the garden. But to understand it, we must first look at the basic biological functions of plants. In total, there are 16 essential elements that plants can absorb. These elements are divided into categories that contain nutrients that aim to support specific biological functions. However, to properly uptake these elements, plants must be fed within an adequate pH range. If you’re interested in learning more about the importance of testing your run-off, read the passages below. 

What is pH?

Potential Hydrogen (pH) is a unit of measurement that describes the acidity or alkalinity of any given substance on a scale of 0-14, with 7 being neutral. In the field of gardening, however, pH is the main factor that dictates the uptake of nutrients in the root zone. Depending on the pH of your nutrient solution, your plants may uptake more or less of a specific element. 

pH is the main factor that dictates the uptake of nutrients in the root zone.

The pH Scale and Nutrient Uptake

For plants to remain healthy and happy, they must be fed within an ideal pH range. For most plants in peat moss or soil-based systems, this pH range falls anywhere between 6.0 – 6.5. This scale can be thought of as the “sweet spot” for nutrient uptake. At this level, plants can uptake essential macro elements such as nitrogen, phosphorus, and potassium, while also having access to important micronutrients that help ward off common deficiencies and lead to the faster and healthier development of new growth. 

This scale can be thought of as the “sweet spot” for nutrient uptake.

Buffering Your Nutrient Solution

To maximize the rate at which your plant uptakes available nutrients, attempt to buffer your nutrient solution in the ideal range before irrigating your crop. Most fertilizers (but not all) will hold an acidic pH value, meaning the ingredients incorporated within the fertilizer will lower the pH of water (pH 7.0) once mixed at the recommended rate. So, after mixing your nutrients, test the pH of your solution, and if necessary, buffer your fertilizer into the appropriate range (pH 6.0-6.5). Use pH Up to raise the pH value of your solution, and pH Down to lower it.

Tip: Dilute small amounts of pH Up or pH Down with water before adding it to your nutrient solution. This will help the solution adjust and decrease the chance of aggressive swings in pH value. 

Issues with pH

A variety of issues can arise if plants are not fed at an adequate pH range. For example, if plants are fed at a highly acidic rate, they will be unable to uptake and absorb valuable nutrients. This can lead to medium acidification, nutrient lockout, deficiencies, and the buildup of salts. If you’ve noticed worrisome growth patterns, it’s quite likely your plants are experiencing one or more of these issues. Follow the steps below to test the pH of your run-off and remedy the problem. 

Plants fed at a highly acidic rate will be unable to uptake and absorb valuable nutrients.

How to Test Your Run-Off

To test the pH of your plant’s run-off, start by collecting a sample. Begin by watering your plants with plain, neutral water (with a pH of 7.0) until roughly 20% of the water runs out of the bottom of your container. Then, collect the run-off into a container and test the sample. Ideal pH ranges for run-off should be between 6.0 – 6.5 in soil/soilless mixes like peat moss. However, any pH close to this range will be acceptable. If you test your solution and the pH deviates more than 1.0 from the ideal range, it’s clear that your plants are outside acceptable ranges of nutrient uptake. Remember, plain water acts like a solvent that rinses and neutralizes excess acidity. So, any number you receive from your run-off test is likely higher than the real pH value. 

Ideal pH ranges for run-off should be between 6.0 – 6.5 in soil/soilless mixes like peat moss.

How to Remedy pH Imbalances 

For any pH value under 5.5, consider feeding your crop at higher pH levels, or, buffer your medium with pH neutralizing compounds like calcium carbonate, dolomite lime, or oyster shell flour. After amending your medium with a neutralizing agent, the pH of your root zone should become stable over the next few irrigation cycles. As you water your plants, the pH neutral properties of either lime or oyster shell flour will slowly dissolve into the soil, thus raising the pH gradually over time. Resume your regular feeding schedule at a reduced rate and continue to re-test the pH of your run-off. When stable, your plants will be able to absorb all the essential nutrients offered to them. Soon, new, healthier growth patterns will emerge, and nutrient deficiencies will no longer plague the development of your crop. 

Feed your crop at higher pH levels, or, buffer your medium with pH neutralizing compounds.

Whatever your style of garden, chances are, GreenPlanet Nutrients has the perfect base nutrient program. To access the programs available at GreenPlanet Nutrients, contact a member of the GreenPlanet sales team, or your local garden supply store for product information and purchasing inquiries. 

Check out our Resource Centre for more product information

Read More


Posted on Leave a comment

What’s the Difference Between Dry and Liquid Fertilizer?

Unfortunately, not all fertilizers are created equal. That’s not to say that one product or feed program won’t perform as advertised, but as we’ve learned from experience, there are a mountain of factors that go into producing a bountiful harvest: plant genetics, environmental controls and growing systems usually trump the list of important inputs — fertilizer, on the other hand, whether that be liquid nutrients or dry fertilizers, are usually the last factor to blame for a less than success crop. However, we can’t discount the importance of quality inputs. That’s why choosing a fertilizer that’s right for you and your garden remains extremely relevant.

But how do we choose the right fertilizer? This, undoubtedly, is a challenging question to answer. It’s true — if you don’t know what you’re looking for, a wall-to-wall selection of plant food can be overwhelming. But have no fear, we’re here to help. Below, we’ll look at the difference between two popular choices of fertilizer: dry and liquid.

Things to Consider Before Choosing Dry or Liquid Fertilizer:

Before we look at the advantages of either dry or liquid fertilizer, it’s necessary to ask yourself a few questions. But even more important, ask yourself about your goals. Why? Well, your individual goals will drive the outcome of your crop. We know, it sounds strange. But consider this: if you’re a lazy gardener (take no offense, we exist), you’ll probably lean towards a nutrient system that requires little to no effort. However, if you’re the type of person who wants to manage every control in the garden, then there are more complex programs as well. Overall, before you commit to a specific nutrient system, consider the questions below: 

3 Questions to Ask Yourself

1. Do I want to grow organic crops?

If the answer is yes, consider selecting only organic fertilizer. This will narrow down your options for nutrient programs, but that only makes choosing easier! Check out Medi-One

2. What kind of system will I be using?

In other words, how will you be growing your plants? Hydroponically? In soil? In coconut fiber? Indoors, or outdoors? All good questions to consider, as your growing method will dictate the appropriate fertilizer, again, narrowing the field of available choices.

3. How much experience do I have?

Just like someone told you when you were young, “learn to walk before you run”. Annoying, yes, but sound advice. There’s no shame in being inexperienced. But if you are new, it’s important to question your experience with plant food. Some fertilizers are more complicated than others. So, consider choosing something easy-to-use with simple instructions.

What’s the Difference Between Dry and Liquid Fertilizer?

First things first: it’s not that one is better than the other. There are, however, differences; the most obvious being that dry fertilizers are made of powder, or granular minerals, and liquid nutrients are concentrates formulated from minerals or organic material dissolved in water. This difference dictates how the fertilizer will be used.

For example, liquid fertilizer will be measured and mixed with water before being fed to plants, while dry, granular products like BackCountry Blend will be broadcast on top of the medium and will slowly dissolve into the rootzone. Some dry fertilizers, however, like Bud Booster, will follow the same mixing and measuring protocol as liquid fertilizers, so be sure to consult the instructions thoroughly.

In short, the biggest difference between dry and liquid fertilizers are the advantages growers can expect from using one or the other. We’ve created a list below of the advantages of using either dry or liquid fertilizer in the garden:

Advantages of Dry Fertilizer:

  • Cost Effective — Dry fertilizers are famously affordable. If you’re on a budget, this advantage might be the deciding factor. Read, “Our Affordable Fertilizer Solution for Outdoor Growing”.
  • Easy-to-Use — Simple and straightforward, dry fertilizers are great for new, inexperienced growers, or ‘lazy’, easy-going gardeners.
  • Simple to Store — Dry fertilizers are compact and easy to store. They’re also hyperconcentrated, so a little goes a long way.
  • Scalable — Coming in at a low-cost, easy-to-use and simple to store, dry and granular fertilizers are great tools for commercial gardeners.

Among all the variables which determine a successful growing season, access to quality nutrients is perhaps the most important. Any experienced grower can tell the difference between an outdoor crop well sown in rich nutrients, and one grown in a medium that leaves the plant wanting for more.

Advantages of Liquid Fertilizers:

  • Intricate Formulas — Liquid fertilizers are formulated with interesting and unique ingredients. Take GreenPlanet’s Massive as an example. You’d be hard pressed to find a similar fertilizer in powder form.
  • Specific Uses — Liquid feed programs often include products that have specific uses, like root expansion, micronutrient enrichment and stalk hardening; this, arguably gives the grower more control in the garden. 
  • Preciseness — Sure, liquid nutrients might be more time consuming, but using them correctly will prevent unwanted issues like overfeeding or nutrient deficiencies.
  • Quality Outcomes  — Serious growers, those who value quality above all else, tend to rely more heavily on liquid nutrients.

So, there are differences between dry and liquid fertilizers, but it’s not that simple — it all depends on how you want your garden to perform. Want to learn more about our fertilizer? Contact a member of the GreenPlanet sales team, or your local garden supply store for product information and purchasing inquiries. What feed program is right for you? Answering this question depends on a few simple, yet important considerations, including gardening practices, previous experience, and cultivation system of choice. 

Check out our Resource Centre for more product information

Read More


Posted on Leave a comment

Understanding the Feed Program: 2 Part Backcountry Blend Outdoor Feed program

Perhaps the simplest, yet most effective fertilizer on the market, the BackCountry Blend (BCB) feed program provides steady nutrition throughout periods of vegetative, flowering and ripening growth, all while being one of the most affordable nutrient systems available to growers today. Originally formulated for the outdoor and greenhouse garden, BCB has quickly become a favorite for new and experienced growers in a variety of systems with specialized growing practices and routines.

This isn’t our first in-depth look at BackCountry Blend – we’ve been covering the potential of BCB for years. Coming in three parts, Grow, Bloom and Boost, the BCB feed program is a granular, slow-release fertilizer that works for gardens of all sizes and for growers of any personality. From large, easy-going outdoor gardens, to small, meticulous indoor shows, BCB delivers the results you expect from GreenPlanet Nutrients – all at a fraction of the price. Below, we’ll take a deeper look at the parts of the BackCountry Blend, and learn everything you need to know about using the feed program

GreenPlanet Nutirents Backcountry Blend: Grow, Bloom, and Boost

What is a Feed Program? 

A feed program is a schedule of plant nutrition that can be mapped in terms of fertilizer dosage, ratio, supplementation, and use over time. A liquid feed program, for example, usually contains several bottles and ranges in supplements including a base nutrient fertilizer, a vitamin supplement, a bloom booster, a source of carbohydrates, and a trichome enhancer. Granular or powder feed programs, being formulated with simplicity in mind, typically have half as many parts.

By combining growing, blooming, and quality-enhancing inputs into a feed program, growers can expect to produce heavy flowers and large, tasty fruits, harvest after harvest. To browse a complete list of feed programs available at GreenPlanet Nutrients, click here. Or, read the blog below for more information on the BackCountry Blend feed program.

GreenPlanet’s Backcountry Blend (BCB) Feed Program

GreenPlanet’s BackCountry Blend feed program is a dry, granular, slow-release nutrient system. This means that unlike GreenPlanet’s liquid fertilizers, which are concentrated solutions that are measured and mixed with water before irrigation, BCB is applied directly to the top layer of soil or soilless mix. After amending BackCountry Blend, and during every irrigation cycle, BCB Grow, Bloom or Boost will slowly release a timed, but well-rounded blend of nutrients into the root zone.

That’s what makes BackCountry Blend so simple – just add the appropriate amount of granular fertilizer to your containers or garden beds and water thoroughly. With the time saved using BackCountry Blend, growers can focus on what matters most in the garden – the plants.

The Backcountry Blend Feed Program Contains:

Base Nutrients

Additive Nutrients

CLICK HERE TO READ THE BLOG AND FIND OUT MORE.

Parts of the Backcountry Blend Feed Program:

Backcountry Blend Grow contains a carefully selected blend of nitrogen (N), phosphorus (P), potassium (K), and calcium (Ca) that are measured specifically for the vegetative stage. With an N-P-K ratio of 16-10-8, BCB Grow is an aggressive vegetative formula with high nitrogen and calcium content that promotes general health, excessive spurts of vertical growth and the production of broad, green leaves and foliage. 

Backcountry Blend Bloom: Base Nutrient

BackCountry Blend Bloom contains a full spectrum of nitrogen (N), phosphorus (P), potassium (K), and calcium (Ca) that are measured specifically for the flowering stage. The Bloom formula of BCB includes higher levels of phosphorus (P) and potassium (K) that plants require during the flowering stage. Phosphorus plays a key role in essential functions of the plant such as photosynthesis, transfer of energy, and nutrient movement through the plant. Potassium aids in the conversion of phosphorus into energy your plants can use and strengthens cell walls to support larger yields. 

Backcountry Blend Boost: Additive Nutrient

BackCountry Blend Boost is designed to be used in conjunction with BackCountry Blend Bloom during the flowering stage. Boost provides your outdoor plants with an extra dose of phosphorus (P), potassium (K), and calcium (Ca), as well as the addition of humic acid. Phosphorus and potassium are vital elements that aid in the development of flowers and the movement of nutrients through the plant. Calcium plays a major role in cell wall composition and also helps maintain chemical balances in the soil. And humic acids, as one of the most treasured, natural sources of nutrients, acts as catalyst for nutrient uptake, making hard-to-transport elements readily available. These added benefits improve overall yields, floral development, color, aroma and hardening in late flower. 

Using the Feed Program 

Like a recipe, growers that use feed programs will have the best results when the proper protocol is followed. Luckily, GreenPlanet Nutrients’ makes it easy for growers to follow the progress of their crop, week-by-week, simply by having access to one of five feed charts, and/or an online nutrient calculator. While using the BCB feed program, follow the weekly progress of your plants by referring to the GreenPlanet’s nutrient calculator, or, download the BCB feed chart below.

Features and Considerations  

Here are some features to consider about the BackCountry Blend feed program. First, GreenPlanet only recommends certain products and supplements for specific stages of plant growth. For example, the feeding program is split into two stages:  vegetative and flowering growth. In these different stages, only certain supplements are recommended for use. For example, BCB Grow is scheduled for the vegetative stage of growth, while BCB Bloom and Boost are charted for the flowering stage.

Our feed charts are split into two stages: vegetative and flowering.

Also, as a slow-release fertilizer, BCB is only recommended to be amended to your soil/soilless mix every 3-5 weeks. So, refer to the feed chart, measure, broadcast either Grow, Bloom or Boost over your medium, water as needed and wait; soon your plants will be bursting from their pots, broad-leaved and soaking up every available ray of light.

One final consideration: the GreenPlanet feed chart recommends feeding plants 0.5-1 tsp of BCB Grow, Bloom or Boost per vertical foot of plant material. But be conservative at first – a little bit of BackCountry Blend can go a long way, especially in warmer climates where gardeners will frequently water their crop.

It is important to note the various differences in climate that can change the way Backcountry Blend works in your garden.

5 Tips on Using Backcountry Blend 

There is no better program for the outdoor or greenhouse garden – the financial savings alone are enough to make every committed gardener switch to BackCountry Blend. Even though BCB is extremely easy-to-use, we’ve compiled a list below of simple, but important tips:

1. Keep your soil moist

Keep your soil moist at all times. Over-drying your medium while using BackCountry Blend may lead to minor leaf burns, although this is rare.

2. Top dress and work in

Top dress your plants and gently work BackCountry Blend into the top layer of the soil. 

3. Be precise

— If using irrigation or self-watering tools, amend the granular beads close to drip emitters and make sure contact with water is made.

4. Be conservative

Depending on the dietary requirements of your crop, your plants may require more or less BCB. Start small and gradually increase your dose overtime.

5. Use measuring tools

Depending on the dietary requirements of your crop, your plants may require more or less BCB. Start small and gradually increaseAvoid “free-handing” BackCountry Blend. Use measuring tools for the most accurate amendment.your dose overtime.

Want to learn more about BackCountry Blend? Contact a member of the GreenPlanet sales team, or your local garden supply store for product information and purchasing inquiries. Or, read more of our blogs on BackCountry Blend.

For all other inquiries, contact a member of the GreenPlanet sales team, or your local garden supply store for product information and purchasing inquiries. 

Check out our Resource Center for more product information

Read More


Posted on Leave a comment

Why Vitathrive is Our Secret to Sprouting Seeds and Rooting Clones Faster

Do your plants need a boost? Try GreenPlanet Nutrients Vitathrive Propagation Solution! Formulated to provide rooting clones, sprouting seeds, and growing and flowering plants with a major dose of plant-enhancing properties, Vitathrive is a necessary component of any expert grower’s feed program. The most important component of Vitathrive, thiamine or vitamin B1, is a major determining factor in a plant’s metabolism. Not only do B1 vitamins promote and establish a plant’s metabolism, but there’s also evidence that thiamine plays an essential role in plant growth and protection from diseases and environmental stressors. It truly is the perfect plant tonic. If you want to learn more about the power of Vitathrive Propagation Solution, read the following article for additional information.

What is Vitathrive?

Vitathrive is our vitamin and mineral-based supplement. With an N-P-K of 0-0-1 and loaded with vitamin B1, Vitathrive is the perfect additive nutrient for young plants, rooting seedlings, or fresh-cut clones. Use Vitathrive aggressively throughout the vegetative stage, on transplant day, and during any periods of stress to increase root growth, reduce internal stress, and strengthen any plant’s immune response. Vitathrive is also hyper-concentrated. Apply Vitathrive at a rate of 1-2ml per litre (4-8 ml/gal) throughout the entire vegetative and flowering cycle. If your crop looks sad, stressed, or shrivelled, give it a helping hand with a dose of Vitathrive.  

Watch the YouTube Channel, Grow Your Four, use Vitathrive to establish newly cut clones.

The Role of Vitamin B1 (Thiamine)

Defence and Protection

Supplemental vitamin B1 (thiamine) has been a central part of agricultural research since the 1930s. But even in recent years, the role of B vitamins has been cited as a major contributor to plant health. For example, in an article published in 2018, experts argue that there is an overwhelming amount of evidence linked to thiamine and plant protection (Subki et al, 2018, p. 37). More specifically, the study cited found that thiamine carried antioxidant properties. This means that plants high in thiamine were more likely to be resistant to stressors such as low oxygen levels, high and low temperatures, light stress, fungal diseases, and pests (Subki et al, 2018, para. 10).  

Nutrient Uptake and Root Expansion

Plants ingesting additional vitamin B1 have also been shown to have increased nutrient uptake and root expansion, allowing growers to feed their crops with less inorganic elements. This evidence comes from a research paper published in 2017 that looks at the effect of thiamine hydrochloride on the growth and nutrient uptake of mustard greens (Sajjad, 2017, p. 265). The aim of the experiment was to identify differences in growth patterns and habits of nutrient uptake in two strains of mustard greens.

Soak the seeds in water an a B vitamin formula for 15 minutes. This will speed up the sprouting process.

(Robinson, 2012, p. 43 of The Grower’s Hnadbook)

The conclusion of the study was as follows: seeds soaked in an aqueous solution of thiamine had significantly stimulated growth patterns compared to regularly germinated mustard greens (Sajjad, 2017, p. 275). Also, there was a correlation found between vitamin B1 and increased vegetative growth (Sajjad, 2017, p. 275). The study found that plants fed with a solution containing 0.03% thiamine exhibited an increase in natural plant hormones. This increase in hormones resulted in higher rates of photosynthesis, faster growth, and increased nutrient uptake (Sajjad, 2017, p. 275). 

When to Use Vitathrive

GreenPlanet recommends using Vitathrive propagation solution when germinating seeds, propagating clones, or, throughout the entire vegetative period and from weeks 3 – 7 of the flowering stage. During propagation, Vitathrive will enhance the performance and germination success of seedlings and clones. The excess of thiamine will protect young plants from fungal diseases like pythium and exaggerate nutrient uptake, while the kick of potassium (0-0-1) will encourage early root stimulation. 

Cannabis plant cutting in rockwool cube with roots.
Early root stimulation will ensure your cuttings are quickly established in their grow medium.

These benefits are extended into the vegetative and flowering periods. However, the added protection from external stressors such as resistance to high/low temperatures, drought, excess humidity, pests, and disease is magnified as your plant’s uptake vitamin B1. Remember, vitamin B1 cloaks your plant’s in a protective aura. So, if your environmental conditions are less than ideal, or if you’ve come across pests or pathogens, consider adding Vitathrive to your established feeding routine. 

There’s no better time than now to start your garden off right with the help of Vitathrive. For all other inquiries, contact a member of the GreenPlanet sales team, or your local garden supply store for product information and purchasing inquiries. 

Works Cited

  • Subki, A. (2018). The role of thiamine in plants and current perspectives in crop improvement. B Group Vitamins – Current Uses and Perspective. Retrieved November 1st, 2021 from ResearchGate.net 
  • Sajjad, A. (2017). Effects of thiamine hydrochloride on plant growth and nutrient uptake of mustard. Applied & Pure Bio. Retrieved November 1st, 2021 from BiologyJournal.org

Check out our Resource Centre for more product information

Read More


Posted on Leave a comment

5 Steps to Properly Flush Your Crop For Harvest

Flushing is an extremely important part of the cultivation process. Most indoor crops have a lifecycle of around three months – two weeks for propagation, another two for the vegetative stage, and eight weeks for the flowering period. During this time, growers enrich their crops with base nutrients, vitamin supplements, bloom boosters, and more, each week scaling up their feeding ratios to ensure their plants are absorbing a heavy dose of carefully crafted elements. Fortunately for plants, these feeding programs are packed full of essential elements that maximize potential yields. However, a heavy harvest isn’t the only thing to consider – cleanliness is also a major factor that determines the quality of a crop. If you’re new to cultivation, read the following passage for a complete understanding of how to properly flush your crop before harvest. 

What Is Flushing? 

Flushing, or a flush, is a term used to describe the action of rinsing a plant’s root zone with excess amounts of water. As mentioned above, growers enrich their crops with an array of nutrients in all stages of growth. These nutrients, which are essentially a combination of different micro and macroelements, tend to build up in the soil system over time. This accumulation of minerals happens not only in the root zone but also within the plant itself. While high levels of nutrients are needed to accelerate plant growth, the build-up of primary minerals such as nitrogen, calcium, phosphorus, and potassium in freshly dried flowers can often leave the product with a harsh, bitter taste and blackened, tar-like ash. To avoid this upset, growers will often flush their crops to wash out minerals that have built up in the root zone over time.

To avoid dried flowers issues, growers will often flush their crops to wash out minerals that have built up in the root zone over time.

How to Properly Flush Your Crop Before Harvest 

  1. Start to flush 10-14 days before harvest
  2. Flush your plants until run-off
  3. Test the run-off samples and log the data
  4. Use beneficial bacteria
  5. Monitor your crop

#1: Start to Flush 10-14 Days Before Harvest 

There’s an industry consensus that plants in soil/soilless substrates need at least a 10-14 day flush. So, time your harvest correctly, and make sure to cease the use of plant food approximately two weeks before your crop’s harvest date. Or, follow the recommendations on your established GreenPlanet feeding program. For growers not using a feeding program, this mark will likely be around the sixth week of flower. However, if you’re managing a strain with a longer flowering time, be sure to consult strain-specific growing guidelines to ensure your crop has an adequate flush without becoming over-ripe. 

Example of where the Flush Period is indicated on GreenPlanet Nutrient FeedPrograms.

#2: Flush Your Plants Until Run-Off

The best way to completely saturate your medium is to water your plants until run-off. Start by watering your plants with plain, neutral water (with a pH of 7.0) until roughly 20% of the water runs out of the bottom of your container. For example, if your start by watering your potted plants with 1 Litre of plain water, at least 200mL should run out of the bottom of your container. This action will guarantee the flush of built-up sediment and mineral salts. 

Start by watering your potted plants with 1 Litre of plain water.

#3: Test the Run-Off Samples and Log the Data

If you want to be sure you’re flushing correctly, simply collect the run-off and test the samples with a conductivity meter. Start by flushing your plants until 20% of the water runs out of the bottom of your container. Then, collect some of the water in a container and test the sample with a conductivity meter. Finally, log the data and repeat the process every time you flush your plants. The data will ideally indicate a rapid decrease in salt concentration over time, meaning your plants are slowly flushing concentrations of salt away from the root zone, and are therefore becoming cleaner in the process.

Definition: Electrical Conductivity (EC)
The relative strength or concentration of a solution, or its ability to conduct an electrical charge. Other measurement solutions include the Parts Per Million (PPM) scale and/or Total Dissolved Solids (TDS) estimations. 

How Does EC work?
Salt emits an electrical charge (electrolytes) when in a solution. By testing the conductivity of that charge, you can get a reading of the relative strength of the solution.
The data will ideally indicate a rapid decrease in salt concentration over time, meaning your plants are slowly flushing the built-up sediment and mineral salts.

#4: Use Benefical Bacteria

Using a source of beneficial bacteria during the flushing process can have amazing benefits. Adding bacteria to the root zone speeds up the breakdown of hard to dissolve minerals. And so, since you’re trying to rid your plants of excess nutrient salts during this stage, using a beneficial bacteria supplement can lighten the load and ultimately accelerate the process of nutrient and fluid uptake. 

If you’re looking for a tested microbial supplement, try GreenPlanet’s Root Builder. Formulated with two sources of bacteria, Bacillus Licheniformis and Bacillus Subtilis, Root Builder can quickly increase microbial activity in the root zone, allowing for increased uptake, yield, and trichome formation.

#5: Monitor Your Crop 

It’s completely normal for plants to undergo physiological changes during the flushing period. In fact, it’s positive that certain changes take place. Since your crop is nearing the end of its lifecycle, it’s common for growth rates to slow, and for new colours to emerge. Also, due to the lack of nutrition during this stage, it’s likely that old foliage will begin to yellow and die off. But don’t worry, this is a normal transition sometimes referred to as “autumning-off”, or the process of a crop expressing autumn colours during the flushing process. Overall, the changes above are a good sign that your plants are nearing maturity. 

Plants undergo physiological changes during the flushing period, and old foliage will begin to yellow and die off.

Whatever your style of garden, chances are, GreenPlanet Nutrients has the perfect base nutrient program. To access the programs available at GreenPlanet Nutrients, contact a member of the GreenPlanet sales team, or your local garden supply store for product information and purchasing inquiries. 

Check out our Resource Centre for more product information

Read More